How to configure a Belkin Router to Disable DHCP.
The first step in configuring the Belkin router would be to connect the Ethernet
cable directly from the computer to one of the numbered Ethernet ports in the
Belkin Router. Then power up the Belkin router and
then power up the computer. After the computer has opened to its desktop,
double click on Internet Explorer and let it completely open. It may display
Page cannot be Displayed, but that is all right. Type the following address
into the address bar of Internet Explorer
http://192.168.2.1
and
click on go. A Login box should display where you will want to leave the
password field blank and click on Submit. At this point the following page
should display.
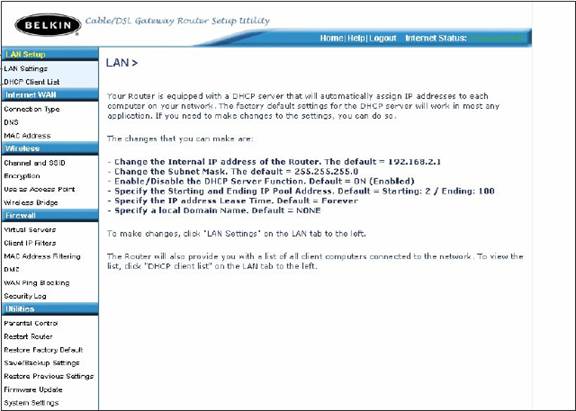
Click on LAN Setup and you will get The LAN page to display from where you will see the current configuration.
To make changes you will need to click on LAN Settings.
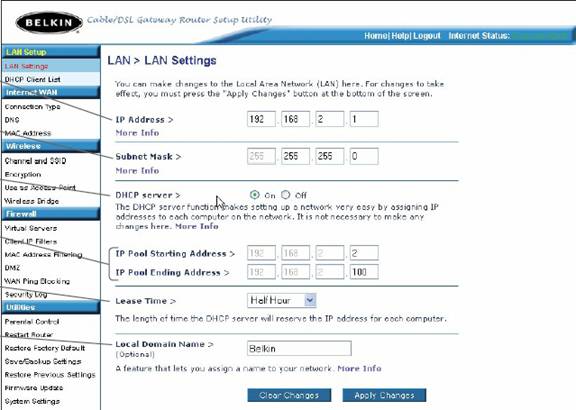
From this page you can Disable DHCP. You should change the LAN IP address to one that will correspond to the other routers subnet. For example, if the other router's IP address is 192.168.1.1, then you could change the wireless router's LAN address to 192.168.1.254. If the other router's LAN address is 192.168.15.1, then you should use one that will correspond to it's subnet like 192.168.15.254. Click on Apply Changes for the change to take effect.
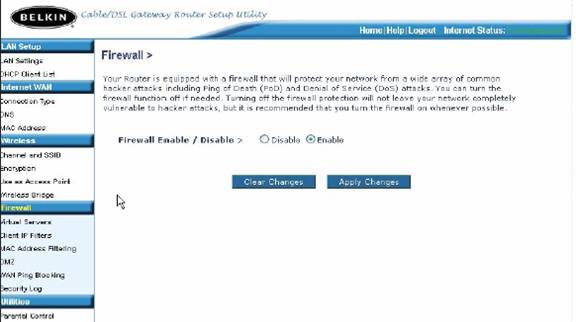
To disable the built in firewall on a Belkin router, go to the Firewall links on the menu. From the Firewall page you can Enable or Disable it.
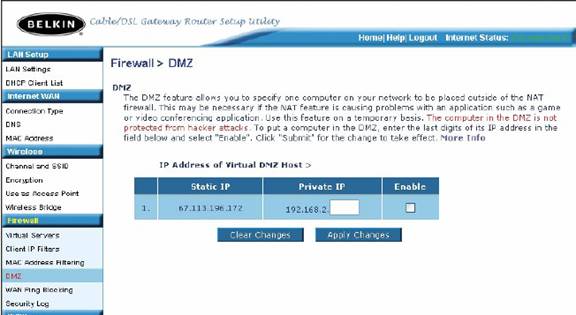
In some cases, if you experience one-way audio on a VoIP connection, you can correct this issue by placing a static IP address on the IAD and placing it into a DMZ zone. Under Firewall on the Menu, you will see the link for DMZ. The DMZ zone allows you to specify one device that will reside outside the firewall. This may become necessary if the firewall is causing issues with the return audio.
To place the IAD in the DMZ zone, enter the last IP octet of the IADs IP address in the IP field and select Enable. Then, click on Apply Changes for the change to take effect. The IAD should be given a static IP address so that it will not change.