Connecting a Netgear Wireless router to another router that supplies DHCP.
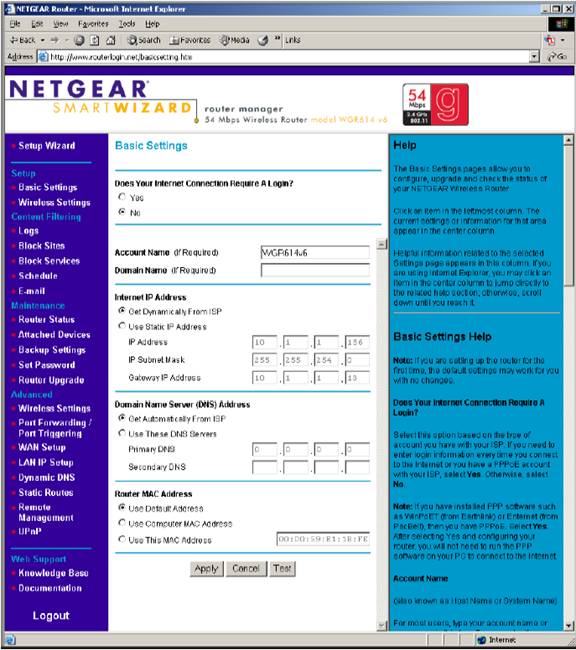
If there is already a router or a router/IAD acting as a DHCP server on your network then you will want to disable DHCP from the second router, in this case the wireless router, if you don't double NAT can cause one way audio and signaling issues for a VoIP connection, as well as other connections. The first step in configuring the D-Link router would be to connect an Ethernet cable directly from a computer to one of the four numbered Ethernet ports in the Netgear wireless router. Then power up the wireless router and then power up the computer. After the computer has opened to its desktop, double click on Internet Explorer and let it completely open. It may display Page cannot be Displayed, but that is all right. Type the following address into the address bar of Internet Explorer http://192.168.0.1 and click on go.
A box requesting a user name and password prompt will appear. In the username field type the username "admin", in the password field blank type "password". Then click on OK. Although, these screenshots were taken from a particular model of Netgear router, they should be able to be used for many other similar Netgear wireless routers as the screens will be very similar and allow you to make these settings without much difficulty.
Go to the LAN IP menu and disable DHCP by Unchecking Use Router as DHCP Server.
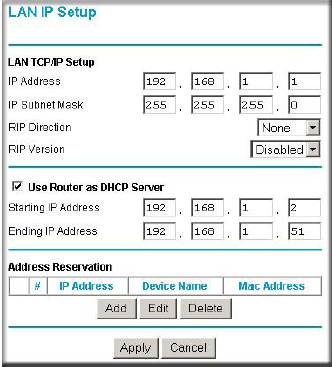
Select LAN IP and put in the correct IP address. For example, if the other router's IP address is 192.168.1.1, the you could change the wireless router's LAN address to 192.168.1.254. If the other router's LAN address is 192.168.15.1, then you should use one that will correspond to it's subnet like 192.168.15.254.
Next Click on Apply to save settings.
Connecting the two devices. Un-power both devices and put an Ethernet cable into one of the regular ports of the first router which will act as the DHCP server. Connect the other end of this Ethernet cable into the one of the Ethernet ports of the wireless router. Do not make any connection into the Netgear Wireless router's WAN port.
Placing an ATA device into the DMZ of a Netgear Wireless router.
Log into your router (see above) or with some models you can use the following URL http://www.routerlogin.net in the address field of your browser. A box requesting a user name and password prompt will appear. In the username field type the username "admin", in the password field blank type "password". Then click on OK.
Navigate to the WAN Setup under the Advanced Section and click onto it where you will want to place the IP address of the ATA as the Default DMZ Server. The default DMZ server feature is helpful when the NAT translations that the Netgear performs are incompatible with the application, in this case VoIP. In this case the incoming traffic going to the VoIP ATA will be forwarded to the Default DMZ Server, which is the ATA.